Once you have thoroughly learnt the neck positions (from half position to fourth position), it’s time to break into the higher register of the cello. Beyond fourth position, we encounter a new fingering system to accommodate the diminishing physical space between the fingers and the changing angle of the left arm. Hence, positions five to seven are called the three finger positions. Mastering this portion of the fingerboard is an exciting time. The extended range unlocks the door to a vast amount of repertoire, much of which is not transcribed or arranged, but unaltered and intended for the cello. It also presents a steep learning curve. If you haven’t encountered it already, you’ll have to begin reading in the tenor clef. Although the difference between bass and tenor clef is easy to grasp, it can take time adjusting to the new layout and getting used to switching between clefs within one piece. And of course, there is a new and rather different fingering system to learn.
")
Let’s begin with a bit of revision in order to highlight the essential differences between the neck positions and the three finger positions. In the neck positions, we cover an interval of a minor or major third from the first to fourth fingers – a minor third in closed positions and a major third in stretch or extended positions. In closed positions we play semitones between adjacent fingers and whole tones between the first and third fingers or second and fourth fingers. In stretch positions we play semitones between the second and third or third and fourth fingers; whole tones between the first and second or second and fourth fingers; and an augmented second (equivalent in sound to a minor third) between the first and third fingers. This is shown in fig. 2 and 3 below:
|
|
|
")
")
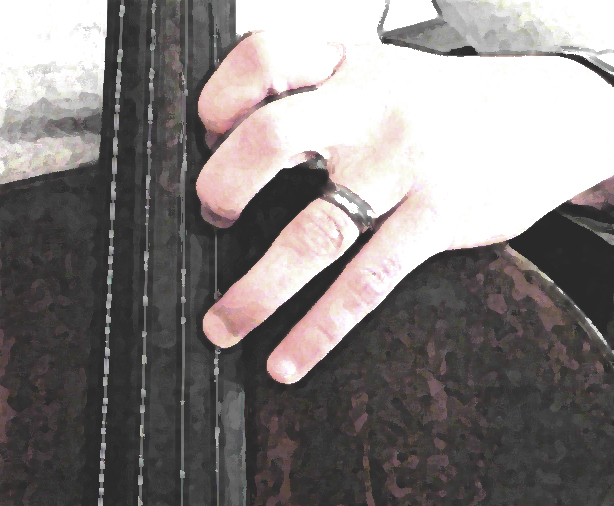
When we consider the position of the left arm beyond fourth position, it is easy to understand why we stop using using the fourth finger. With the arm extended forward, even when the fingers remain at roughly a ninety degree angle to the strings, it is difficult to use the fourth finger without introducing a significant level of strain to the forearm. For this reason, and the fact that the intervals are physically closer together, we adopt the three finger system form fifth position onwards.
Now whole tones can be played between the first and second fingers or the second and third fingers, which maintains the maximum interval of a major third within one position. Just like first to fourth positions, each position from fifth to seventh has variants (upper and lower versions) and extensions.
|
|
|
|
")
")
The three images above show the three versions of upper fifth position on the A string. Fig. 4 shows the closed position with a semitone between the first and second fingers (F# – G); and a whole tone between the second and third fingers (G – A). Fig. 5 shows the alternate version of the closed position with a whole tone between the first and second fingers (F# – G#); and a semitone between the second and third fingers (G# – A). Fig 6 shows the extended position where there is a whole tone between the first and second fingers (F# – G#); and the second and third fingers (G# – A#).
Chromatic variations within the position must be addressed by moving one finger while keeping the rest of the position stationary. Take a look at the following sequence, which occurs within one position (upper fifth) in the range of a minor third:
")
The second finger is a semitone above the first finger in bars 1 and 2; and a whole tone above in bars 3 and 4. The first and third fingers remain in place so that the position itself remains stationary. The following exercise will help to develop stability in a stationary three finger position with chromatic variation, and should be repeated in all variants of fifth, sixth and seventh positions as you become familiar with them.
")
Typically, the first three finger position we encounter on the cello is upper fifth. The easiest way to find this position is to play the natural harmonic (an octave above the open string) with the third finger, then find the correct places for the second and first fingers. The following exercise will help you to find and settle into this part of the fingerboard.
")
The next step is to find upper fifth position from fourth position – an area of the fingerboard that you are familiar with and overlaps fifth position. These exercises will help you to become familiar with the shift from fourth to upper fifth position.
")
All of the above exercises should be practised on all four strings.
Did you find this post useful? Please consider making a donation.
© D C Cello Studio 2012

Well, this would be still too early for me I think, but thank You for the detailed description 🙂 One quick remark: for me, if I click on Fig 2, Fig 3 is shown in large. I don’t know if it’s only for me, but maybe not. Anyway, thanks! Mate
Thanks for that, Mate! It wasn’t just you – I embedded the wrong link into that image, so thanks for the heads up!